Showing posts with label nuts. Show all posts

February 25, 2012

Salted brownie with cashews


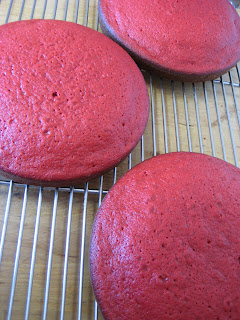
Last year I mastered the art of the red velvet cake. I feel I have made enough to do them in my sleep. I've made red velvet layer cakes that blew peoples minds, turned them into cupcakes, mini cupcakes and even got asked if I'd make a few wedding cakes. In my mind, I have mastered the red velvet cake and that pleases me no end.

This year I have been playing around with chocolate, to be more specific a classic fudge brownie.
While visiting in Chicago this January I noticed salted caramel was all the rage, so when I saw a tub of it in WholeFoods I picked up a tub to see what all the fuss was about. YUM! Bite size pieces of caramel coated in chocolate and then sprinkled with flaked salt. I'd eat one...then two, you can see the pattern I'm sure.

Salty sweet is one of my favourite combinations, however, I knew I didn't want to whip up a batch of caramels on a regular basis so I thought about putting the chocolate and salt combo together in something that is a popular sweet treat and that is how I came up with a brownie.


I first tried my idea out using salted pistachio nuts.


I have to tell you that this is the only photo I took because it got gobbled up faster than I could snap a pic! The smell drove me wild while baking, I had my neighbour over for dinner the night I made it and she went back for seconds while sipping a glass of red (perfect partnering!).

A few weeks later (I mean let's face it, if you bake chocolate brownie you eat it and there is only so much chocolate I want in the house due to my lack of self control!) I found a bag of unopened raw cashews in the cupboard and decided to give them a go with my favourite brownie recipe. The salt idea came once the raw cashews were on top of the brownie mix looking kind of plain and boring. I sprinkled on some sea salt, popped them in the oven and waited.....


These are my end result!

I cut them into bite size pieces and took them off to a meeting I was attending that evening. To my relief they were a massive hit. Not being a real nut lover, I have to say I am happy with the result and so are the boys. Nic and Alex gobbled them down in seconds while Max and I picked off the nuts and eat them slowly, enjoying the salty sweet flavours. Maybe this is the winning combo? or is there another nut I have missed?


February 19, 2012

Finishing Touches


One of my favourite family meals is a stir fry. I don't have a favourite recipe because I am always digging around in the fridge trying to use up the leftover veggies, or I'll get a craving for a certain vegetable, buy loads of it and then figure out how the rest of the family will stand eating it in copious amounts (I have had a taste for mushrooms lately).

I think I have stated in a fair few of my posts that I don't believe it hiding vegetables from the kids, instead I like to mix them with foodie bits I know they will like and it also means I won't get "Oh,this is disgusting" when they first lay eyes on the prepared meal (I learnt this when Max was going through his 'everything is DISGUSTING' phase, a word you really don't want to hear when you have just spend 20 minutes in the kitchen after a long hard day at work!)


Everyone in my family loves eggs cooked every way except scrambled so my good old fall back when it comes to sprucing up a stir fry is to make a three egg omelet. I'll always add fresh herbs (like basil, coriander or parsley) fish sauce and fresh garlic. Always make sure you have a hot wok, add a little bit of oil (2 tablespoons) and then cook your eggs really quickly. I never cook them all the way through because you don't want the omelet to be rubbery. Once they are almost done, flip the omelet over turn off the heat and slide it onto a paper towel to cool while you make your stir fry.
When it comes to serving, I cut the omelet into strips and pop it on top so it looks quite impressive.


Another taste sensation I tried out last week was quickly roasting cashew nuts in Chinese 5 spice with chili flakes. Again, just before I cooked the stir fry, I heated up about a 1/4 cup of peanut oil in the wok, lightly warmed the oil then added the cashews, once they were turning golden I added some fresh garlic slices then quickly strained off the oil, doused the nuts in 5 spice, chili flakes and salt then let them cool.
I find I can get away with adding dried chili flakes to nuts without the kids being to concerned about the spice because they are mixed in with all the other flavours.

My average veggie stir fry just got really interesting and was gobbled down in record speed. I didn't however manage to get away with excessive amounts of mushrooms but I did notice they ate more than usual, so win/win for me!


May 25, 2011

Oven-roasted nuts


No one does roasted nuts quite like Americans. I am not a big nut lover, in fact two cashews are about my limit, however, I have been known to eat more than my usual two when roasted.

Nic on the other hand loves them! He will happily pop handfuls into his mouth and think nothing of it, as do Max and Alex. When we had friends around the other night I was thinking of ideas as to what I could serve with pre-dinner drinks. I had planned on stuffing dates (that blog will be along shortly) but needed something to compliment yet not over shadow the dates. Perhaps it was Nic's suggestion, I'm not too sure but somehow I ended up serving sweet/chili nuts that would of impressed my American friends.
When we lived in the States I use to get served salads that contained nuts. My first thought was always- Oh great! but as I started eating I realised the nuts were interfered with and in my option it's the only way to go!

I'd love to tell you a funny story or have more to add but to tell you the truth, I'm exhausted from a big week in the kitchen and I have to be up at five something tomorrow morning, so I will leave you with this very easy and tasty recipe I happened to concoct. I am sure it could be played with to taste even better but I have to say I was pleased with this and even managed to eat a few myself!

Oven roasted nuts
1 cup raw cashews
1 cup raw walnuts
2 teaspoons sesame seeds
3-4 tablespoons brown sugar
1 teaspoon dried chili flakes
2 tablespoons oil
1 teaspoon salt

Preheat oven to 180 degrees
Place all ingredients in a bowl and toss to combine.  Line the tray with grease proof paper and place nut mix on the tray and spread evenly.
Bake for 10 minutes, toss with a spatula, cook for a further 7 minutes, toss again and then cool and serve with totally cold.


The boys are loving these for an after school snack.

January 30, 2010

Florentines


The other day at work I had a request for Florentine biscuits from one of my clients. When I saw the email I thought for a minute on what to do. Do I go and buy them or make them? The only reason I thought this was because EVERY time I have made Florentines they end up dry and terrible. It's baked goods like these that have kept me out of the pastry section of kitchens for years!

 I ran down to our local patisserie shop and saw their florentines and pretty well made up my mind to make them as soon as I saw them. For 80 cents you got a florentine about as big as a 20 cent piece which looked like no love was put into them at all- I just couldn't do it.
Scanning the internet for a recipe was an interesting venture, a lot of recipes with cornflakes and condensed milk (which just didn't seem right to me), looking further I found a few recipes that just sounded like all the other florentine recipes I had used to no avail. Finally I came across one on www.cooks.com

The recipe looked like it was going to be sticky (due to the fact it had honey, cream and butter in it) so I thought what the hey and got down to business. I have to tell you when I look through recipes I usually only look at the ingredients and if they seem OK I'll then buy the bits and bobs then read the method just before I begin. Quite silly really, I think is has something to do with me never really following a recipe to a T (sadly I do the same with my own recipes!). A bad habit that was just about to teach me a lesson.

You see I weighed everything out and was ready to go- put the sugar, cream etc into saucepan and on the heat before reading any further. "...boil until the candy thermometer registers 240 degrees...."
Dammit! I have always meant to buy a candy thermometer but never really got there.
What to do? They were due out within the hour and I didn't have time to buy a thermometer so I bit the bullet, through caution to the wind and trusted my instinct to not stuff up.
 The recipe did state ".....or until a firm ball is formed". I waited for the 'firm ball' HA what a joke. I had a lot of bubbles but nothing looked like a firm ball to me so again I trusted my gut and  took it off the heat when I thought it was best.
I am not sure if I was 100% right BUT they looked a beautiful golden brown when the almonds were thrown in and the honey, butter combo was intoxicating- I felt I did OK.

Following the rest of the recipe I was feeling pretty good until I took the trays out of the oven and found my little teaspoon sized balls had all run into each other and all that was left was a thin toffee, almond layer.

Nothing a cookie cutter couldn't fix so after getting toffee burns on 80% of my finger tips I finally had these little babies kinda looking like Florentines and the best part was they set!
Of course Sydney being Sydney the day was humid and heavy so once I brushed on some chocolate it was straight into the fridge with them.
I managed to deliver them to the client on time and held my breath that the chocolate didn't melt entirely. Of course there were left overs so the family and I have been enjoying Florentines with our cup of tea in the mid afternoon- so very civilised!
 If your in the mood for a challenge then go ahead and make a batch but probably a good idea to nip out and grab a candy thermometer or blow the dust off the one you have in your bottom draw.
Good Luck!

Florentine cookies
1/2 cup castor sugar
1/3 cup heavy cream
1/3 cup honey
4 tablespoons unsalted butter
120g (4oz) dried fruit finely chopped (I used dates and cranberries)
2 teaspoons grated lemon rind
160g (6 oz) blanched sliced almonds
3 tablespoons plain flour
1/2 cup dark chocolate buds, melted with 1 tablespoon butter

Combine sugar, cream, honey and butter in a small saucepan and bring to the boil
Once boiling place in candy thermometer and wait for it to register 240 degrees, or until lots of big bubbles form and it turns a light golden brown colour.
Remove from heat and stir in dried fruit, lemon rind, almonds and flour.
Stir until well combined.
Drop small teaspoons of batter on greased proof paper leaving room between each spoonful.
Flatten each cookie with a fork dipped in milk (very helpful)
Bake for 8 minutes or until they look golden and bubbly.
Remove and immediately shape with a round greased cookie cutter.
When cookie rounds are firm, remove from sheet and cool completly.
Coat back of each cookie with the melted chocolate and butter. Leave to set (fridge works really well!)
Makes about 14-16
Note: I have changed a few ingredients, original recipe uses 4oz ground candied orange peel instead of lemon zest and dried fruit.

January 8, 2010

Arwen's family chocolate cake


One of the best things about going on holiday is the fact that you rest, eat and relax. So far we have done all of the above- a little more eating than we really need but I figure we'll get back on track once we are back in Sydney and back to normal.
My sister-in-law wont let me cook "A chef doesn't need to cook on a holiday Camilla", she told me on my very first day so I have been sitting back and enjoying her wonderful cooking and watching my waistline double in size. It also didn't help when she whipped up a wonderful chocolate cake for dessert last night. The smell was intoxicating and when she served it with lashings of cream the centre was still warm, I was in complete heaven!
After taking a few bites the flavours of dates, hazelnuts, almonds and walnuts shone through and you couldn't help but take another bite. Alex managed to force down all his broccoli because the smell of the baking cake was driving him wild and once on the table it got eaten in seconds.


Like me Arwen adds to recipes and plays around with them to give the dish a more personalised touch, so if you don't like walnuts, dates or almonds swap them out for the foods you love. The other thing I like about this chocolate cake is the fact that is isn't full of fats and sugar. Half a cup of sugar for a good family chocolate cake and no butter almost makes this good for you!
So while your still thinking you must drop a few pounds, spoil yourself and enjoy this decadent yet healthy chocolate cake (you know dark chocolate is good for you- right?)

Arwen's Family Chocolate Cake


250g mixed unsalted nuts roughly chopped (almonds, hazelnuts,walnuts)
250g pitted dates/dried figs, chopped
1 cup dark chocolate buds
1/4 cup cocoa powder, sifted
6 egg whites
1/2 teaspoon salt
1/2 cup caster sugar

Grease a spring form pan with cooking spray and line with non-stick baking paper, preheat oven to 180 (350) degree then set aside.
Combine nuts, fruit and chocolate bits in a large bowl then stir in cocoa powder.
In a separate bowl whip egg whites with salt until soft peaks form. Slowly add sugar and whisk after each addition until whites are shiny and thick.
Use a metal spoon to fold your egg white mixture into your fruit and nut mixture then fold until just combined.
Place mixture into your spring form pan and bake for 45 minutes.
Turn off the oven and open then door to cool the cake in the oven (the egg whites need the dry heat for best results)
Cut into wedges and serve cool or slightly warm with thickened cream

Note: Arwen has a fan forced oven so she lowers the heat a little to 170 and turns off the oven about 5 minutes earlier so just keep an eye on your oven

August 20, 2009

Nanny's peanut butter biscuits

Yesterday was such a busy day here at the Baker household; I had to go to work, the kids went to school and mum got to have the house all to herself for the day. I thought she would enjoy the break from our madness and noise (or should I say the boys noise!). Mum has had a pretty intense week at work herself, being a caterer she put in some massive hours before her Sydney break (fairly typical in the Hospitality industry- if you ask for holidays, you'll be worked into the ground until the day you leave).
I thought mum could put her feet up, sit back and totally relax........well I think this lasted for all of 15 minutes! I had to ring mum from work telling her I was getting a late lunch rush and could she please get the boys from school- no worries. When I met up with them at home I found the massive pile of laundry mum had washed, hung out to dry and then ironed!!! Not only was the laundry done, I turned into the kitchen to make a cuppa tea for us when I spotted the home baked biscuits she had whipped up for an after school snack- WOW!
I can't remember the last time I arrived home to find home-made biscuits that I didn't make. I put that kettle on to boil faster than a three year old could eat a stolen chocolate (and at our house that is pretty fast!). Food always seems to taste that much better when someone else makes it and these peanut butter cookies were no exception. The nutty, crumbly, buttery texture melted in your mouth and you just had to go back for seconds, or was that thirds Nic?
Thanks mum for all the help and especially for the ironing and biscuits, your the BEST!

Nanny's Peanut Butter Biscuits
1/2 cup unsalted butter
1/2 cup sugar
1 egg
1 cup self-raising flour
1/2 cup crunchy peanut butter
1/2 cup chopped salted peanuts
icing sugar for dusting

Preheat oven to 180 (350).
In a mixer, cream butter and sugar until light and fluffy.
Add egg and beat until smooth and combined, scraping down the sides of the bowl.
Stop mixer and add flour and peanut butter, mix on medium speed until well combined.
Press a generous teaspoon of mixture into the crushed peanuts before placing on a greased baking tray.
Bake for 15 minutes, cool on a wire rack and once cool give a good dusting of icing sugar.

Enjoy with a nice cup of tea!

July 13, 2009

Chocolate+Pistachio= Perfecto


I don't know what it is about me lately, but I am all about the sweet treats! It must be the cold weather or something but every time I head to the kitchen all I want to make is dessert. There is nothing wrong with this of course, however my hips are starting to scream out for a drawstring waist!
I have decided to end my sweet tooth with, in my opinion the perfect pairing of chocolate and pistachio. This wicked combination is a winner all the way from your mouth right through to your stomach. The warm, rich chocolate pudding melds perfectly with the cold, smooth taste of pistachio gelati and for an even bigger hit why not throw in a warm chocolate sauce to make it an all time family favorite.
When I served these the other night I wasn't going to give the boys pistachio, I was quite happy to stick with the classic vanilla- however Max soon set me straight and insisted he (and Alex) have the 'green one'. I forgot he ate his body weight in pistachio gelati when we lived in Italy and only have myself to blame as I was the one who introduced it to him. I didn't make the same mistake with Alex, alas the colour pulled at his heart strings and there you have it, both boys now dive into my gelati stash....sometimes I wish I wasn't so insistant they try everything at least once!
I just had to take a photo (with much eye rolling from my husband) of the pudding all mixed up on my spoon, I wanted to savour the memory of how yummy it really was and I think this shot captures it beautifully, I mean don't you just want a little tasting yourself?
If so head for the kitchen, whip up the puddings and sauce then run out and buy your favorite gelati and prepare for a match made in dessert heaven. I promise the next post will be savory all the way.....

Chocolate Puddings and Sauce

Chocolate sauce:

1 cup milk- hot

1 tablespoon cornflour

2 tablespoons cocoa powder

2 tablespoons cold water

¼ cup castor sugar

50g dark or milk cooking chocolate, chopped

1 teaspoon butter

Puddings:

1 ½ cups plain flour

4 teaspoons baking powder

½ cup castor sugar

¼ cup cocoa powder

100g dark cooking chocolate, chopped

1 cup milk

1/3 cup melted butter

2 eggs

½ teaspoon vanilla essence

Method

Chocolate sauce:

Heat milk over medium heat until hot but NOT boiling.

In a small bowl combine cornflour, cocoa powder and cold water, stir to remove lumps.

When milk is hot add chocolate mixture, sugar and chopped chocolate.

Stir to combine, bring back to a medium heat and continue stirring until the sauce begins to boil.

Remove and stir in butter, once melted and sauce has a gloss pour over puddings.


Puddings:

Preheat oven to 180°C, spray a muffin tin with cooking spray and leave to one side.

Sift first four dry ingredients into a medium bowl and throw in chopped chocolate.

In another bowl mix together all the wet ingredients and whisk with a fork to combine.

Pour wet mixture into dry mixture and stir until you have a thick batter.

Pour into individual moulds.

Place muffin tin on an oven tray and pour 1/2 cup of water onto the tray for extra moisture.

Place in oven and bake for 20 minutes.

Remove from oven, tip out puddings, place in individual bowls, pour over chocolate sauce and pop a dollop of pistachio gelato on top- serve warm.

Notes

I like to make these individually so I can freeze the ones I am not eating and pull them out when needed, pop them in the microwave to heat up and eat them with choc sauce (if I have any left) or with what ever else is around the kitchen.

The other great aspect of this recipe is there is no cream to make you feel guilty!


July 4, 2009

Red Velvet Cake


Red velvet cake would have to be one of my all time favorite American cakes. It looks sooooo impressive, it tastes divine and last but not least, it is quite easy to make, so when a friend of mine headed for another birthday this week, I used this as a perfect excuse to make the gorgeous cake!
I got the recipe from my all time favorite cookbook mag- Saveur and adapted it to my tastes. The Saveur recipe calls for 12-oz cream cheese and 12-oz butter for the frosting. I thought I could not justify 12 oz of butter if I was to eat more that one slice, so I made it 'user friendly', cut the butter down and proudly ate my body weight in cake and frosting without the guilt :0).
If you'd like to give the Saveur recipe a go it's in issue no. 91, however my version was scrumptious and worth a return visit sometime this year.

Red Velvet Cake
For the cake:
1 tablespoon butter
2 1/2 cups plus 2 tbsp cake flour
1 1/2 cups castor sugar
1 teaspoon baking soda (bi-carb)
1 teaspoon cocoa powder
1 teaspoon salt
2 eggs
1 1/2 cups vegetable oil
1 cup buttermilk
2 tablespoon red food colouring
1 teaspoon vanilla extract
1 teaspoon white distilled vinegar

For frosting:
12 oz cream cheese, softened
6 oz unsalted butter, softened
1 1/2 teaspoon vanilla extract
3 1/2 cups confectioners' sugar (icing sugar)

1 1/2 cups flaked almonds, roasted

For the cake:
Preheat oven to 180 degree (350) and grease three 8-inch round cake tins with butter, dust with extra tablespoons of flour then set aside.

Sift remaining dry ingredients into a medium bowl and set aside.

In a mixer beat eggs, oil, buttermilk, food colouring, vanilla and vinegar until well combined and smooth, 1-2 minutes.

Add dry ingredients to wet ingredients and beat on medium speed for 2 minutes.

Divide batter between the three tins, bake in the oven for 30 minutes, rotating pans half way for even cooking. Let cakes cool for 5 minutes in the tins then remove and cool on a wire rack until cold.
For the frosting:
Beat cream cheese, butter and vanilla in a bowl of an electric mixer until well combined. Add sugar and beat on a medium speed until light and fluffy- approx 7 minutes.
note: butter needs to be soft for best results

Assembly of cake:
Put one layer of cake on a plate and place a 1/4 of the frosting on the top.
Add second cake layer on top and repeat frosting. Set remaining layer on top, layer with remaining frosting on top and around the sides of all three layers.
Press on flaked almonds to the sides of the cake then leave to set for 10 minutes.
Slice and serve

April 17, 2009

Peanut sauce


In this day and age of nut free, lactose intolerant, minimal this, no to that- I was craving something you don't see around much anymore. Whenever you brought a satay stick at a take away joint or family fun day at the local show when I was growing up you were offered satay sauce and it was a give in you'd have it- I mean why not, that is half the meal right there! 
You'd have to lick you hand because it would be running down, the delicious creamy, nutty flavour combining with your favorite beef/chicken or pork satay is the best fete, show or holiday snack ever in my opinion.
I was down at the shops the other day with Max picking up some lemons and fresh fish for my fish & chip craving I was having (and I am talking full on, beer battered fish, not grilled- full fat indulgence, ohhh it was good!).

 There is a great little whole in the wall Asian food place I couldn't resist so I picked up a couple of chicken skewers expecting to be offered satay sauce. To my shock and horror it was naked! No sign of sauce anywhere and defiantly no 'can I get you something to go with that' coming from the friendly gentleman behind the counter.
Granted the skewer was delicious and Max and I were well impressed with the size and flavour, but I couldn't help think it was missing something. I understand there are so many people out there allergic to nuts and I also understand there are even more people allergic to dairy, garlic (I don't understand this one?) soy, blah,blah,blah BUT I was just thinking, what about all the people out there who are denied the luxuries of the 80's and 90's when it was all about flavour and culture?
 This quick and easy recipe is for all people out there like me who if they decide they want to indulge in a childhood memory then memory they shall get! This satay sauce it a great standby to have in the fridge and trust me it is easier to make than you think and 100 times yummier than the bottled variety you buy at the shops. 
Next time you are cooking up some satay's on the BBQ or purchasing them from your local, remember the satay sauce- if you can eat it without keeling over that is.

July 24, 2008

Eggplant and kids

It has been a busy week for me. I am back at work part time, kids have play dates I am trying to keep up with and we are constantly running around doing one job after another, weather it be getting signed up for school, dentist appointments or dragging the kids grocery shopping. By the end of the day I am knackered!
  We are not a huge meat eating family, not through choice- I have decided I only will buy organic-preservative, steroid, mad cow free meat. For us this means cutting down on the amount we eat due to the growing prices. It is not a bad thing really because when you finally get to having the juicy New York strip steak at the end of the month- it tastes like heaven on earth! Eggplant (that's aubergine for those of you in Europe) however does not have the same association when telling my boys what's for dinner. 
  I had an eggplant sitting in the fridge for a week- they do last a very long time. I was heading out the door to go to book club in 30 minutes and I needed to eat. The boys had already eaten due to the crazy schedule of this week and they will again eat by themselves the next night so I wanted them to at least eat a delicious meal while I was at work. Max saw me cutting up the eggplant, rolled his eyes and of course said "YUCK!"- typical comment, however I told him he will be eating it tomorrow night. This bought much wining and moaning, I told him I'd serve it with toasted almonds and he said he'd 'just pick out the almonds and be done with it'.
 Well, I made the eggplant and cooked it up with tomatoes, peas and a touch of chili flakes. Served it with couscous and toasted almonds- Beautiful!  The crunchy almonds complimented the eggplants soft silky  texture really well and the hint of chili rounded off the flavor. I was really happy with the out come and I did it in 30 minutes- you have got to love couscous when you are doing a meal on the fly.
 The next day I told Nic to serve Alex's with a little plain yogurt to reduce the chili bite and wait and see for Max. This morning I dare ask how dinner went....."Great! the boys ate it all up without complaint" I couldn't believe it after the conversation I had with Max the day before. Nic did say they asked "what is this black stuff" with Nic replying "there is nothing black in there- now who wants a story?" with that they continued eating and most importantly- enjoying. 
I understand eggplant isn't the first choice for a family meal but it is totally doable- you just need to add a bit of nutty crunch, a touch of chili for some people and the smooth yogurt for others, oh and don't mention the 'black stuff'.